Faux Hem Stitch Your Perforated Paper

Perforated paper makes all the difference when I cross stitch--I can see where to stitch!
Whether you're a fan for speed or convenience--or like me, because your eyes appreciate the holes, perforated paper is a great fit for lots of stitching projects. I especially like the new 18 ct. paper from Wichelt. Two strands of floss cover the surface completely so holes disappear in a design area (see the banner below), and in unstitched areas, the tiny holes provide interesting texture, and aren't distracting at all. I also love that I can fit curves into a small space--script writing is so readable!
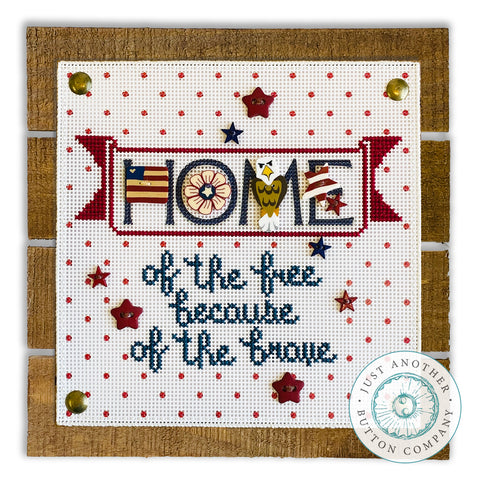
And to my delight, the new paper also prints well! In addition to Home of the Free, several more JABC NeedlePrint designs are set to debut soon. We print part of the design on the perforated paper and include a chart so you can stitch the details--fast, fabulous, and button-embellished, of course. Each NeedlePrint kit includes a cardstock print to back the finished stitching.
Because perforated paper products tend to be quick to stitch, I like to have simple finishing plans as well. A 4" or 5" design snaps quickly into a self-finishing frame from Beth Gantz. That's how we finished the Queen Bee after stitching the JABC chart on a square of pindot printed paper.

If you prefer traditional mat & frame finishes, our NeedlePrint designs include a margin. You can also trim off that margin and finish quickly by mounting the stitched design on a board or box. I made a quick trip to a Hobby Lobby store and found all these 6"- 8" choices to complete our newest projects. Many of the pieces are also sold online.

My current favorite look is the perforated paper design on top a board, but I wanted a finished edge for the paper. Where there's a will, there's a way...
These are my Faux Hem Stitch solutions.


The left photo shows a (red) whip stitch to overcast the edge of the paper. This is the more simple finish. Wrap the thread around the trimmed edge of the paper, stitching in each hole.
On the right, follow the blue thread as it gets progressively darker-- stitch up then move forward two holes and stitch up again. Now move one hole back and stitch up. Repeat that--forward two holes and back one hole to create a smooth woven edge. It also looks nice to sew a running stitch one row inside the woven edge. Use two strands of floss to create these finishing stitches--DMC 3865 is a good color choice to match the white of the perforated paper. You'll notice that I trimmed off the holes before stitching the edge.

This is a close up of the 2-forward, 1 back woven edge. When mounted, the paper really does appear to have been hemmed. I'm loving this look!
Stay tuned for more NeedlePrint perforated paper kits--and you can browse here to see what's available now.
Happy Stitching!
